All right, so last time I wrote about the design process of my character for the #Artwar contest, Briannon, I wanted to follow up with a post on the modeling and sculpting. Well, when I finally had by idea on paper and was ready to get started, I had this brilliant idea that this was a great time to try and learn new things. (Now with a week left of the contest and so much work to do, I am starting to question the brilliance in my idea).
First thing I did was to try out Maya LT, which I have actually never even opened before. Thanks to my knowledge of 3D in general, I managed to get "something" at least. It did however take forever and I absolutely hated the popup-menu system for everything that has a button in 3DS Max. I can say that if I had allowed myself to use Max instead, I would have gotten a great deal further than where I am at this point. In some miraculous way, I did eventually manage to create a good enough basemesh that I could import in ZBrush and go from there.
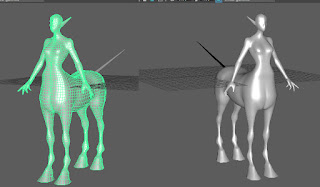 |
| Basemesh in Maya |
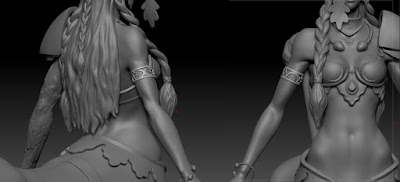
Even though it did take me a bit longer than it probably should, the body was pretty straight forwards to do. The challenge here lay in getting the anatomy right, especially on the horse part of the body.
 |
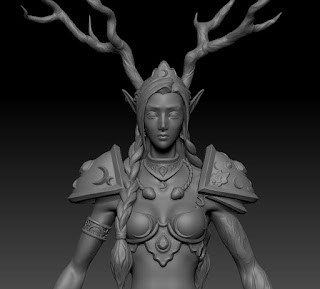
| First pass on body in ZBrush |
My next challenge was the hair, but with a lot of research and experimenting I managed to create and combine braids into an intricate hair style. For the future I will want to work on how to better sculpt the ends of the hair and making separate strands to get better volumes. One thing that was very helpful that I found mid-sculpting was the feature of making the window transparent so that you can place references underneath.
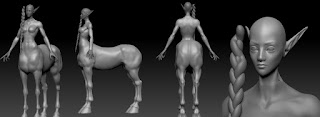 |
| Experimenting with hair and braids |
Hard surface accessories and armour is something that I would normally model in 3DS Max and then only import into ZBrush to create surface details, but since I have banned myself from using Max for this character I needed to find another way. After my experience with Maya when making the basemesh, I was really reluctant to go back to it. On the other hand, ZBrush is to my experience not optimal for hard surface modeling. Not having attempted to do something like this in either software, I had to do quite a lot of research (including mostly crappy and often barely understandable video tutorials) and experimented a bit with both.
 |
| Hair Sculpt |
In the end I actually did all of the sculpts in ZBrush entirely, not using what little I made in Maya. I did this by using masks, either painted directly on the model or by projecting alphas, and extruding from the existing sub tools. Strangely, something as simple as the twisted cord used for the torc and lower bracelet, was extremely challenging to find a good way to do, with a result that I wanted. I tried following other people's rope tutorials but did not like the outcome, or the quality of the tutorials were too poor. Instead of the multiple cylinders that they use, I projected a twisted alpha on a ring and used the deformation tools. The acorn, waterskin and the bag however, were made from spheres manipulated by the move tool or zspheres.
 |
| Shoulder design tests with alphas |
 |
| Bracelet made with alpha |
For the oak leaves and moons, I projected alphas on planes and created morph difference meshes and the just cleaned them up with deformation tools and bent the leaves and added some detail. For the 'triangular moons' and armour/jewelry details I also used alphas, by testing a technique shared by Orb in Blizzard's 2015 ZBrush Summit talk.
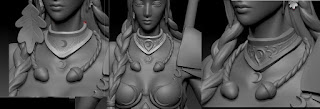 |
| Necklace WIPs |
 |
| First version of wood and resculpt WIP |
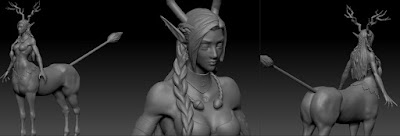
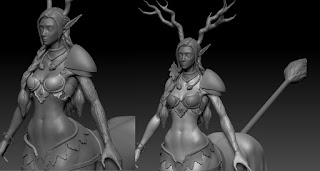
The final challenge was creating the wooden parts. Since I want her to be part oak tree it needed to look like bark. The problem with oak trees is that their bark is very thick and rough and, although they are beautiful trees, not very attractive looking. I just could not get it to translate well on the more delicate character, possibly contributed by the fact that I have never sculpted wood before. Therefore I decided to represent the oak part a bit differently, I actually referenced an oak tree where the branch had wilted and the bark partly come off as well as looking at how others had solved the issue of sculpting wood. It was a bit tricky to sculpt, and it could probably be even better with practice and time, but I got the grade of 'I can tell that it is wood' and I am satisfied with the result.
I have probably forgotten to mention a great deal of things and could definitely delve deeper into how I made each element for future reference when facing similar problems. :) But this is in general how the high poly sculpt was done, I definitely learned a lot and hope I can remember it all. The result is looking even better than I had hoped, so even though I am a bit stressed about finishing in time I am really excited about this character! :)
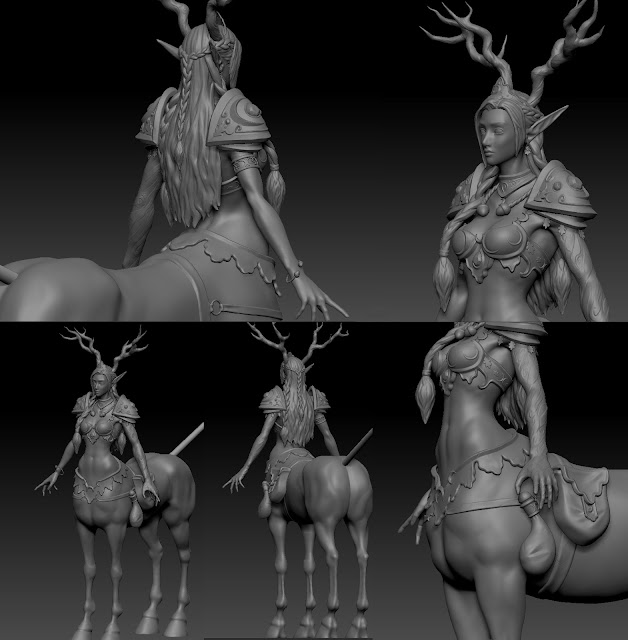 |
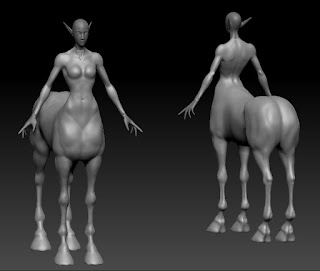
| Final Sculpt |
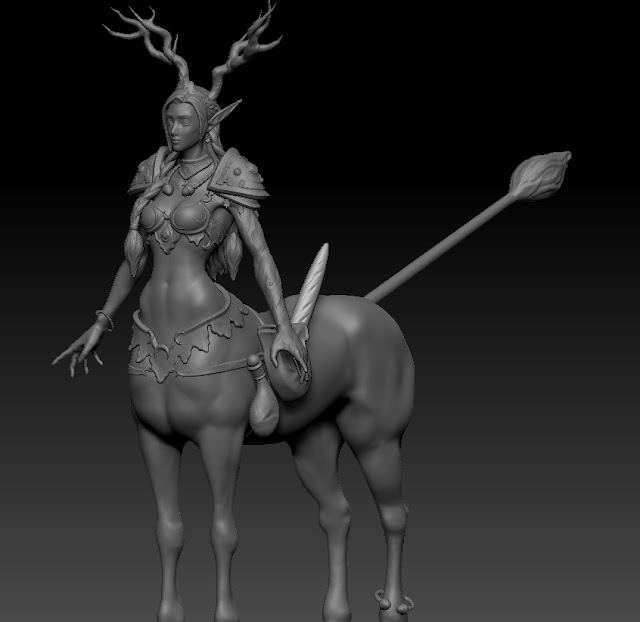 |
| Bonus Pic |


Inga kommentarer:
Skicka en kommentar