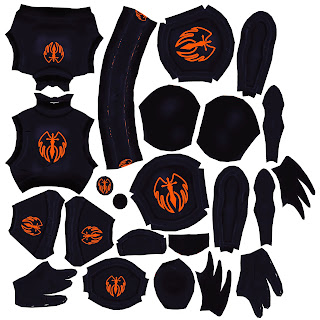
As we want to create a hand painted look I have basically just blocked out where it should be lighter and darker. I would have done the same in Photoshop before going into details, had I done it all by hand. I think that it does not affect the time very much in any direction. The painting itself does take a bit longer to actually paint because Z-brush does not have as easy and accurate controls as Photoshop has, on the other hand it does give me increased accuracy as i can immediately place the colour shifts exactly where I want them, or as close as Z-brush's controls let me. In Photoshop I would have to estimate, save, check Max to see how it looks, make adjustments, save, look... until it looks right.
My conclusion from this, experiment I guess you can call it since I am trying to find new and improved ways to work, is that it is a fast and easy way to block in details. It is far easier painting on the high poly where you can clearly see all creases and details than it is working on UV templates. Even though it does take slightly longer to actually paint, it is sped up by the fact that you can use a mirrored brush so that you can paint general details on, for instance, two leg guards at once and that you can see exactly where the paint should be placed and how it looks in 3D.
Since I have only used Z-brush a few weeks and tried polypainting in it only two days there are probably many tricks that I don't know about that would give better and more accurate results, for instance sharper details. From what i have experienced so far though, I do not see that it could be an alternative for Photoshop when it comes to cleaning and detail work.
During the first bake the hair was not correctly baked and the high poly of the corset went missing so the Diffuse for the body had to be redone, as it got too late at night we have not been able to rebake at the time of writing this. The eyes, boots and hair decorations also look strange since they were not included on the high poly, they have been painted separately so the two maps will need to be merged. The limitations I discussed are very clear here, in particular the pants, as the paint is very blurry. It is very possible that it is only due to my unfamiliarity with how to use the brushes and program though.

There were also some problems with the armour Diffuse, probably caused in xNormal. The belt is my fault since I was tired and merged the belt buckle to the belt on the high poly, which means the belt buckle was projected onto the belt. This is easily fixed by just painting it over, that area will be covered by the buckle anyway. The orange gaps on some parts, for example the belt, are a bit of a mystery though. If xNormal had problems projecting, or seeing, the edges, they should be white, we have no idea where the orange came from. Apart from that the armour pieces came out beautifully and it is just a matter of getting the details down.


Inga kommentarer:
Skicka en kommentar