Visar inlägg med etikett 3D. Visa alla inlägg

måndag 15 maj 2017

Dagger - Finally Done!


So I finally took the time to complete the dagger I started on a long while back before being interrupted by christmas and the artwar contest among other things. Anyway here it is!


I do think that my colour skills are improving, as well as my skills in the handpainted style, but I could still use a lot of practice. Should probably keep making many more of these weapons so I can really nail the style, fortunately I really like working with it. :)

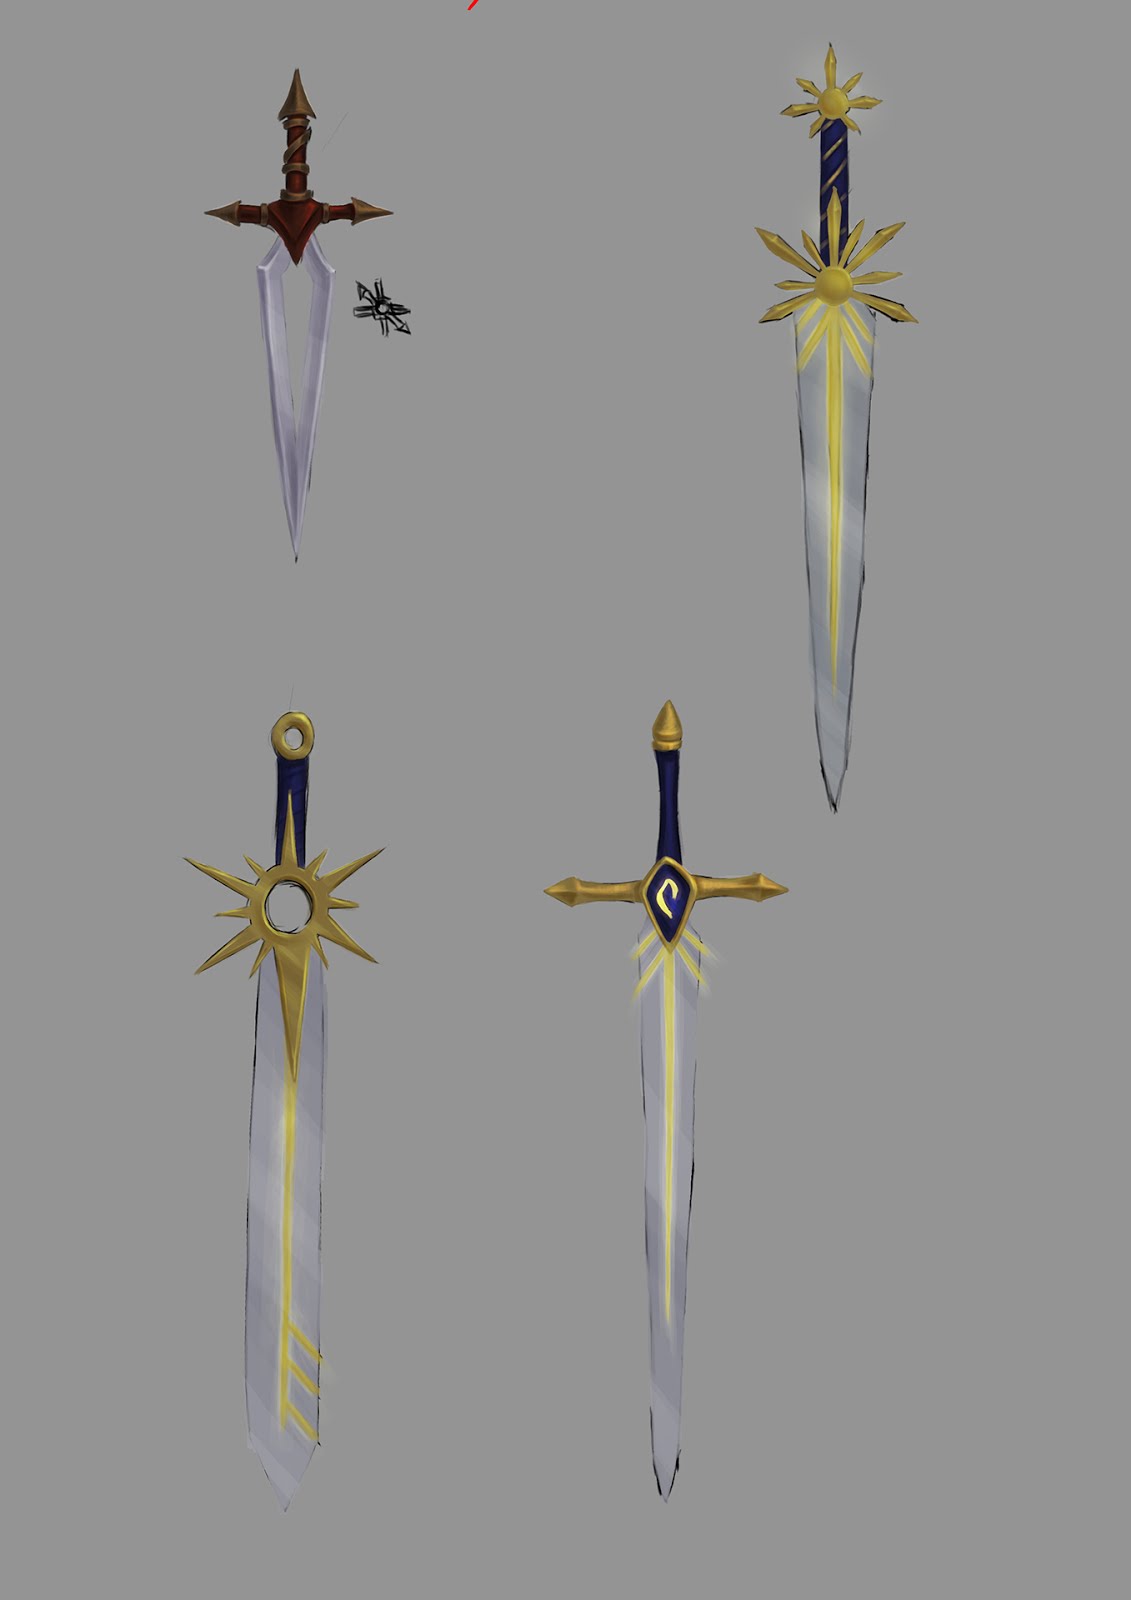
Model in 3DCoat left, concept right.

I am not sure if I am completely happy with how the blade turned out as I think the concept actually looks much better, especially the colours. But compared to the textures I made around this time of year 2 years ago I would say that it is a significant improvement, in design, modeling and texturing.

lördag 1 april 2017

Centaur Animation test


I have been playing around with animations on my centaur a bit, it turns out to be every bit as tricky as I thought it would (perhaps more). The hair is not skinned. the rest has only default skin and only half the body has a control rig, but I am messing around trying to figure out how to go about this. At the moment it is looking truly beautiful, but at least it is going more in the right direction than it did when I started out.

The difficulty does not only lie in the fact that it is a horse (which are very difficult to animate) but also in that it has double spines, four arms and a number of tails, including the hair. I need to figure out a way to either create a control rig where I can have 6 limbs and double spines or perhaps a way to animate without a control rig.

Might be a good idea to take inspiration from Pacman for my next character... But then again, what's the point if you don't try to challenge yourself? (Do not know how I manage to find a way to make everything as difficult as possible for myself).

onsdag 8 mars 2017

3DS Max Tutorial - Setting up Reference Planes

So my programmer friend asked me if I could make another tutorial on how I would model something more complex than a box, combining different types of geometry, and sent me a picture of a lamp. So here is part 1 in lamp modeling: setting up reference planes.


Here is the lamp in question:

tisdag 7 mars 2017

3DS Max Tutorial

A programmer friend was trying to make a 3D box and asked me to do a tutorial, so I made a short introduction to 3DS Max for beginners. Hopefully even programmer friendly! :)


torsdag 2 mars 2017

#Artwar Character Contest: Briannon | Final


This morning was the deadline for the #Artwar character contest which I am participating in. Was going to post my final entry last night, but then their forum went down. :S
Now it is posted and the deadline passed, so I just wanted to share the final result (although it is getting ahead of retopology and texturing parts.

This is the very first art contest that I am participating in and it was definitely a challenge. I am not sure it was the best idea to try and learn so many new things when working on something like this as it did take me a lot of time that could have been spent to make the model even better. But I did learn a great deal of new things, and why not push yourself? It is definitely not perfect and would not have minded one or two more weeks of just texturing, but I did finish the character and within the deadline.

Although I would like to continue working on it, I am going to do the hard thing and let her go. I am just going to accept that this is what I could do at this point, with this amount of time and resources at hand, and move on to other things. I do want to brush up my animation skills and learn more about rigging creatures, so I will probably use this character to experiment with that however. But the rest is done. (Trying to convince myself)


fredag 24 februari 2017

#Artwar Character Contest: Briannon | Part 2 - Sculpting

All right, so last time I wrote about the design process of my character for the #Artwar contest, Briannon, I wanted to follow up with a post on the modeling and sculpting. Well, when I finally had by idea on paper and was ready to get started, I had this brilliant idea that this was a great time to try and learn new things. (Now with a week left of the contest and so much work to do, I am starting to question the brilliance in my idea).

First thing I did was to try out Maya LT, which I have actually never even opened before. Thanks to my knowledge of 3D in general, I managed to get "something" at least. It did however take forever and I absolutely hated the popup-menu system for everything that has a button in 3DS Max. I can say that if I had allowed myself to use Max instead, I would have gotten a great deal further than where I am at this point. In some miraculous way, I did eventually manage to create a good enough basemesh that I could import in ZBrush and go from there.
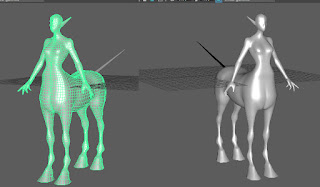
Basemesh in Maya


Even though it did take me a bit longer than it probably should, the body was pretty straight forwards to do. The challenge here lay in getting the anatomy right, especially on the horse part of the body.
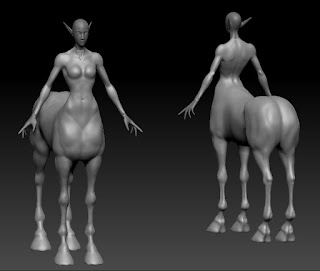
First pass on body in ZBrush


My next challenge was the hair, but with a lot of research and experimenting I managed to create and combine braids into an intricate hair style. For the future I will want to work on how to better sculpt the ends of the hair and making separate strands to get better volumes. One thing that was very helpful that I found mid-sculpting was the feature of making the window transparent so that you can place references underneath.
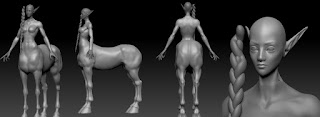
Experimenting with hair and braids


Hard surface accessories and armour is something that I would normally model in 3DS Max and then only import into ZBrush to create surface details, but since I have banned myself from using Max for this character I needed to find another way. After my experience with Maya when making the basemesh, I was really reluctant to go back to it. On the other hand, ZBrush is to my experience not optimal for hard surface modeling. Not having attempted to do something like this in either software, I had to do quite a lot of research (including mostly crappy and often barely understandable video tutorials) and experimented a bit with both.
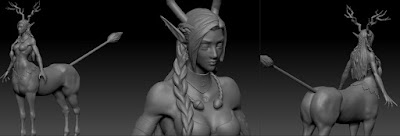
Hair Sculpt


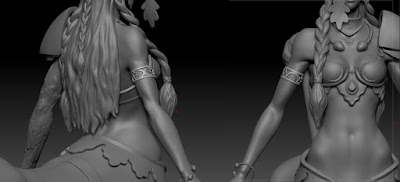
In the end I actually did all of the sculpts in ZBrush entirely, not using what little I made in Maya. I did this by using masks, either painted directly on the model or by projecting alphas, and extruding from the existing sub tools. Strangely, something as simple as the twisted cord used for the torc and lower bracelet, was extremely challenging to find a good way to do, with a result that I wanted. I tried following other people's rope tutorials but did not like the outcome, or the quality of the tutorials were too poor. Instead of the multiple cylinders that they use, I projected a twisted alpha on a ring and used the deformation tools. The acorn, waterskin and the bag however, were  made from spheres manipulated by the move tool or zspheres.
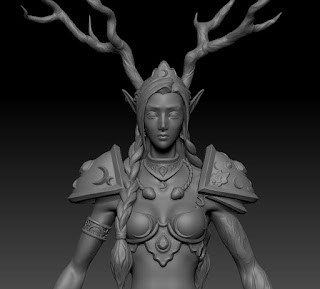
Shoulder design tests with alphas
Bracelet made with alpha


For the oak leaves and moons, I projected alphas on planes and created morph difference meshes and the just cleaned them up with deformation tools and bent the leaves and added some detail. For the 'triangular moons' and armour/jewelry details I also used alphas, by testing a technique shared by Orb in Blizzard's 2015 ZBrush Summit talk.
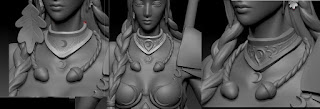
Necklace WIPs

First version of wood and resculpt WIP

The final challenge was creating the wooden parts. Since I want her to be part oak tree it needed to look like bark. The problem with oak trees is that their bark is very thick and rough and, although they are beautiful trees, not very attractive looking. I just could not get it to translate well on the more delicate character, possibly contributed by the fact that I have never sculpted wood before. Therefore I decided to represent the oak part a bit differently, I actually referenced an oak tree where the branch had wilted and the bark partly come off as well as looking at how others had solved the issue of sculpting wood. It was a bit tricky to sculpt, and it could probably be even better with practice and time, but I got the grade of 'I can tell that it is wood' and I am satisfied with the result.

I have probably forgotten to mention a great deal of things and could definitely delve deeper into how I made each element for future reference when facing similar problems. :) But this is in general how the high poly sculpt was done, I definitely learned a lot and hope I can remember it all. The result is looking even better than I had hoped, so even though I am a bit stressed about finishing in time I am really excited about this character! :)
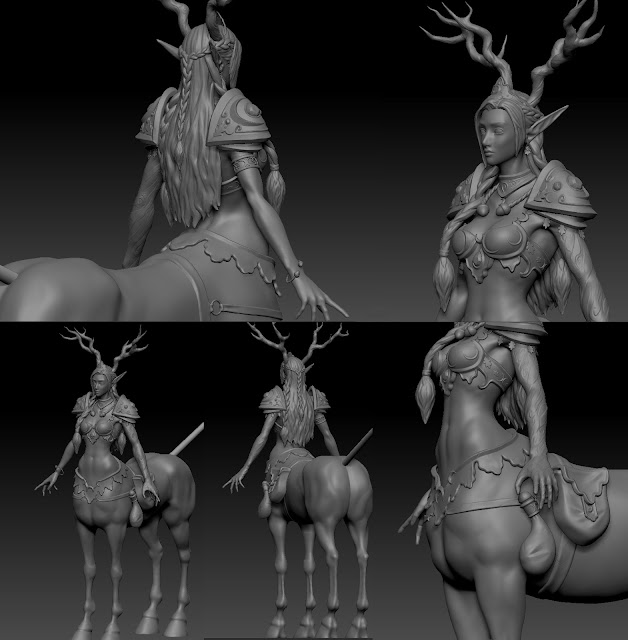
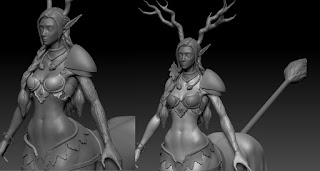
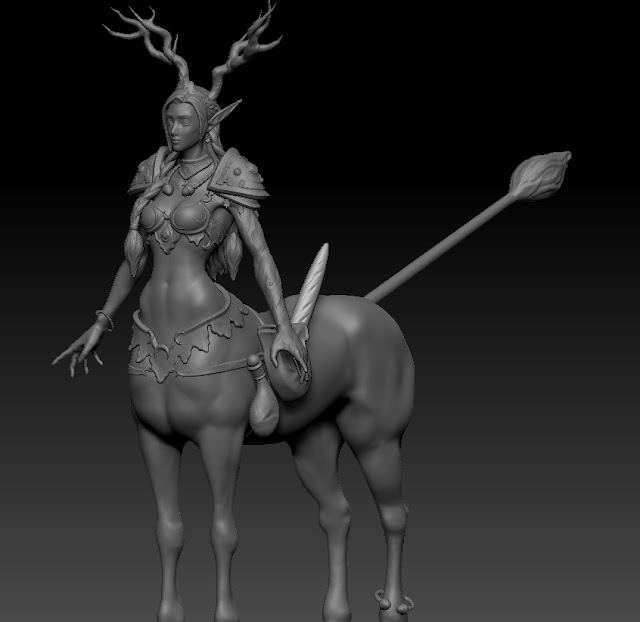
Final Sculpt
Bonus Pic

söndag 5 februari 2017

Dagger Update

Its been a while since my last post so I wanted to make a quick update on the dagger I started working on before Christmas. I chose to continue with the s-shaped dagger and based on the feedback I redesigned it by combining elements of the concepts I made and tried to tie the elements together better. For instance actually making the top "points" holding the vial into the teeth of the skull instead of having both.


I also finished the model and UV-mapped it, currently it is about 1400 tris. I got some feeback during the modeling phase to straighten the blade out, to make it look more like a functional dagger, even though it is a ceremonial weapon rather than one used for fighting.


Even though Christmas got in the way, I have started the texturing, but I have not worked on it for awhile since I have decided to focus on my entry for Cubebrush's #Artwar contest. But I will get to it as soon as I can and post some more updates and eventually a finished dagger that is looking totally awesome and portfolio ready!

Next up I will write a post on my character for the contest!

lördag 3 december 2016

Handpainted Sword

Over the past 7 or 8 weeks I have been taking a class from Brushforge in handpainted weapons, where we have gone through the process from design to finished textured 3D model.

This is where I started out with my first coloured concept sketches:


During the first two weeks, a lot thanks to some really awesome feedback, it developed into this:


It is a sword that belonged to a paladin, ages ago, given to him by the High Lord. Whenever in the presence of danger it would transform and show its true power.


The modeling went pretty fast and most of the time have been spent in 3D Coat painting the textures, and I wish I had discovered a lot earlier how amazing it is for handpainted textures. I especially love the ability to export/import directly to Photoshop. I had a lot of fun painting this, and I think I have learned a lot throughout the process. Compared to the first sketches I made the end result is definitely leveled up. :)

And here it is!


måndag 4 april 2016

Nihteana: Animations

A while ago I finished Nihteana's animations, at least up until a point where I could do no more before I could see all of them implemented correctly in the engine. Fortunately the coders have not found any issues so far.

Nihteana out for a walk, testing the rig and skin in 3Ds Max


I had all my mocap data cleaned since before Christmas and the frames which I was going to use selected. As expected her animations were like a dream to clean up, since I was completely still apart from moving my upper body when doing the shoot and how she always keep her arms apart, there was barely any occlusion. I had hopes that Nihteana's animations would be less of a problem than Tamarrion's had been.

Elbow bone not matching fold in 3Ds Max


 I soon noticed that there was an issue with her arm, as I could not get the elbow to fold properly. It turned out that I had not aligned the fold and the bone well enough, meaning that I had to return to the high poly sculpt to fix it and then readjust the lowpoly and re-skin the model. So Tamarrion taught me how not to make a shoulder and Nihteana how not to make an elbow. This was a setback, but it also gave me a chance to go back to the highpoly and make her hands bigger and have a better-looking bend, pushing their quality further.

Channel spell animation, before animating fingers


The experience of animating hands which I had had before was that it was not that big of an issue. The difference between Tamarrion and Nihteana is that Tamarrion always has one hand firm on her sword and the other slightly closed, all fingers moving simultaneously while Nihteana's animations are all about the movement of her long fingers. I hoped that they just might not be a problem although I had a feeling deep inside that I could be terribly wrong. That feeling was right. The fingers turned out to be a complete pain, and it was seriously tricky to figure out how they would move in relation to each other. What I did was film my own hands, trying to move them as I wanted her fingers to move and then take keyframe screenshots to see how the fingers should be positioned at different stages of the animations. This was something that I had to redo several times with various animations, since they did not want to cooperate. I had to be really really careful in which order I applied the poses on the fingers.

Screenshot used for her finger animations


Motionbuilder was not always cooperating either, causing additional issues with the key frame animations for the fingers. Apart from the fingers, my biggest problem, which I have never come across before, which occurred in almost every single animation was that there was twitching in the upper body flowing all the way through the arms and hands. This meant that I had to go and look at the fcurves of every single bone to find and attempt to fix the problem. It took me a great deal of time and I am still not completely sure of why I had this issue. Sometimes the animation had seemed fine while working on it and then all of a sudden there it was. I believe that it might have something to do with which frames you select when you choose your looping sequence, but I had been really careful to make sure that the first and last frames matched as close as possible in position.

Trying to fix the fcurves


I also got this weird bug in Motionbuilder (2015) it took me days to find no answer at all until I finally found someone with the same problem. The problem I had was that the bones were invisible even though the xray mode was activated. I tried sending the file to a friend and he could see the rig, so I knew it was not the file but the program. To fixed this I did a complete reinstall of the software, which worked, for a day or so. This is when I finally found the answer, it seems as if Motionbuilder remembers this "setting" for the file, so you have to open Motionbuilder by opening an uncorrupted file and from that open up the file you want to work with.

Skinning below belt is not perfect, but it does not matter since we use cloth physics


Animating the shoulder pads was another challenge, which I had to redo a couple of times. I needed to readjust the rig slightly to get a better pivot point, but I believe this is something that can still be improved. This was also an attempt to fix an issue with the feathers which seemed to have a life of their own. Somehow the feathers moved from there position in the keyframes when I added new ones. Since I had to move the shoulder pads with the arms my greatest fear was that they would twitch between animations since I was unable to use poses on them for some reason. The programmer who is working with her has not noticed any problem with them so far though.

Feathers no longer wanting to follow their bones


There was another great issue with the shoulder pads however, which caused a great deal of stress. Once I had redone all their animations, since they would not follow when I transferred the animations to an updated version of the model, everything was working fine in Motionbuilder so I sent it to my colleague to test in the engine. Everything seemed to be working fine, apart from the small detail of the shoulder pads and skulls hanging from the belt were flying around in a complete mess somewhere in the vicinity of the character model. I went back to Motionbuilder to find what could be wrong, but did not find anything. I tried creating a clean take and import the animations to a new character but there was no difference. It was only the .fbx from Motionbuilder, one that was rigged and skinned but not animated from 3Ds Max was perfect. I tried to find an answer if it could have anything to do with the character extensions but found nothing. To test if it might be something with Unity I opened the .fbx in Unreal and all animations worked perfectly.

Dance dance, Underground Rave test in Unreal


This meant that whatever the issue was it was something that only Unity reacted on. The solution turned out to be removing the skinning of the shoulder pads and skulls, luckily they were skinned as separate objects, reset the xform and re-skin them. This time when I imported the animations, expecting to have to redo the shoulder pad animations, everything seemed to follow and I could send it to test in Unity again. This time there were no problems that we could find before seeing how the animations blend between each other when she behaves in the way she is supposed to in the game, meaning that my work was done for this time.

torsdag 3 mars 2016

Nihteana UV-Mapping

Before moving on to the rigging and skinning of Nihteana, the character I have been working on, I UV-mapped her. Doing this I encountered something which I have not before. Max just did not seem to want to relax the pieces properly, even though there should be no problem with the seams and all the pieces would just shrink and shrink until manually stopped.


Eventually I managed to get the pieces to where I wanted them but Max thought otherwise and rearranged some parts of a few pieces when packing them into the UV space. Meaning that I had to re-relax some pieces and try again.


It took me some time and a lot of fitting the pieces together in order to have similar pieces close to each other while leaving as little space as possible. Another issue that I faced was where to place the seam on the arm. There did not seem to be an obvious place for it. Based on the character's behaviour, where she will always strive to be facing the player character and hovering above the ground, I decided to take a risk in its placement and put it on the top back of her arm. After discussing possible solutions this seemed like the lesser of evils as it is the angle which will be seen the least by the camera, although it will most likely be seen.


I have to be very aware of this in the texturing process and be careful when I paint around the seam so that it will be as invisible as possible. Working on Tamarrion I managed to make her seams hardly visible at all, but that was probably largely due to the fact that I had polypaint as a base and tried to avoid colour shifts on the seams themselves. I know that it might become a problem, but being aware of it will hopefully help me make the seams look barely visible.

torsdag 4 februari 2016

Nihteana High Poly Armour

Last week I finished the high poly model of Nihteana, the first thing I did was to complete the shoulder pads. These skulls were also used to hang from her belt, but without the decorations.


I had a basic skull/shoulder pad that I made in 3ds Max, from that I dug out the shapes more and sharpened the details. Then I added the decorations by drawing the on by hand. I would have used a pattern to do this but I did not know a way of doing this on a surface that curves on several axes, or curves at all.


This was also a problem when creating the bracers, I had the shapes and edges complete in order to maintain the hard edges. To solve this I tried adding a sketch that I had made to test the placement of the pattern in 3ds Max through adding the texture as polypaint. There were some issues getting it right, but in the end I used spotlight to paint it on and get a general idea of the placement.


When I had it placed I used the pattern as a guide to carve the decorations into the bracers by hand. As I mentioned I could not find a way to draw the larger patterns onto the curved surface but the flowers were small enough to use the image as a brush. Since the bracer is not completely symmetrical I was also unable to use the mirror brush, meaning I had to carve the entire thing by hand.


onsdag 3 februari 2016

Back to ZBrush

Since we finally got our release out I have been able to get back to working on Nihteana. There were a few things that needed fixing but most of the work was to create the missing pieces, such as armour and belt. I had not prioritised them earlier since I wanted to test the main body in animation before completing her. In case there were any problems it would be easier to adjust before adding details. Once I got to that point however, I had to switch tasks and work on environment assets and the release that was made in early January.

My greatest issue with the model was the elbow, I had problems trying to figure out exactly were the muscles should go and how the skinny dead arms would look. I figured out that I had thought right but executed it wrong, meaning that I needed to move the muscles on the lower arm to match the "elbow bone" better and create more of a crease. This meant that I had to go back to ZBrush to adjust the Highpoly model.

This is how it looked before, the elbow bone is at the back side on the bottom of the arm, while the fold is on the front side of the arm.


When fixing it I moved the fold to the upper part of the arm, so that it would be in a straight line from the bone of the elbow.


I had also decided to enlarge her hands, to achieve a more stylised and creepy look, again this meant making adjustments in the Highpoly. The hands were also a bit flat so I rounded the hand, lowering the sides with the pinky and thumb and raising it around the middle finger. Even though I thought I had adjusted where the fingers start on the hand (they do not start from a straight line) it was also looking too straight so I pushed it towards the hand between the pinky and ring finger and away from it between the ring and middle fingers to make the silhouette more interesting.


Because of making these adjustments I destroyed some of the details, meaning that I had to re-enforce the knuckles and sinews. As I had to to this I tried to emphasise them even more than I ad before.


I was planning on showing the armour pieces and belt that I have been working on, but this turned out pretty long so I will save that for the next post. :)

onsdag 6 januari 2016

Release

We have been working hard both before Christmas and over the last few days, but now we are impatiently sitting at school waiting to make the release that is required for the course we are currently taking.

We have a build that is complete and we are just now starting to upload everything and getting ready to send it out! We are super excited and hope that you will like it! :)


tisdag 10 november 2015

Working on Tammy's rig

I have been tweaking Tamarrion's rig to get better results when animating the shoulder, as an extension of the work that I have done with the edge flow. I am still unsure about the best way to place the rig, but I am hoping that I am better on the mark this time around. On the left side I have moved the shoulder and arm bones to where the actual bones should be. The reason for them being where they were was a process of trying to find what looked the least bad when animating the shoulder, as we had lots of problems. As mentioned before these problems were the result of a combination of the edge flow and the rig.


I have also started working on the skinning, I had to redo it completely although hoping to be able to copy at least parts but hopefully I have learned something along the way and achieved a better result this time. Again I am not one hundred percent sure of my abilities and the result. I guess we will have to see how it goes with the animations.

I'll end with some pics of the result when trying to copy the old skin layer to the new model, I hoped that at least the legs could be partly intact since they had not been touched, but here is what happened.